DIY Walkway Installation: Your Step-by-Step Guide on How to Build a Walkway

Are you thinking about building a DIY walkway on your property? Creating a charming garden path or a sturdy pathway to your front door can be a rewarding project that enhances your home’s curb appeal.
The best part? You don’t need to be a professional to get it done.
In this guide, we’ll walk you through every step of a DIY walkway installation using TRUEGRID® permeable pavers. Let’s dive in!
Before You Begin Your DIY Walkway
Installing a walkway isn’t just about laying pavers. There’s actually a bit of prep work and planning you have to do before you get started. Here are a few of the things you should take care of before you start your do-it-yourself walkway:
Tools and Materials
To successfully install a DIY walkway, you’ll need to gather the right tools and materials. Here’s what you’ll need to get started:
- Permeable Pavers: At TRUEGRID®, our pavers are the best choice for a DIY pathway because they’re incredibly easy to work with and have the most staying power out of any pathway material.
- Aggregates: You’re going to need coarse and medium gravel for the different layers of your DIY walkway.
- Geotextile Fabric: This fabric is a base layer that is essential for separating materials, stabilizing soils, and mitigating weeds..
- Edging (Optional): Edging material, while optional, is recommended to help maintain gravel fill and provide a visual separation between the path and the other surfaces.
- Tools: You’ll need a shovel, rake, and hand tamper or mechanical compactor to prepare the site and install the pavers properly. You may need a hand saw or heavy pruning shears, or an electric saw like a sawzall or circular saw to cut the TRUEGRID. Plus, don’t forget your safety equipment, like gloves and safety goggles.
Keep an Eye on the Weather
Weather can make or break your do-it-yourself walkway project. Installing permeable pavers requires dry conditions, so keep an eye on the forecast. Avoid working on rainy days, as wet soil can compromise the stability of your pathway and make the process far messier than necessary.
A Step-by-Step Guide on How to Build a Pathway
Now that you’ve gathered your materials and ensured the weather is on your side, it’s time to dive into the step-by-step on how to make a walkway. Each stage of the DIY walkway installation is crucial, so take your time with every step.
1. Design and Plan Your Walkway
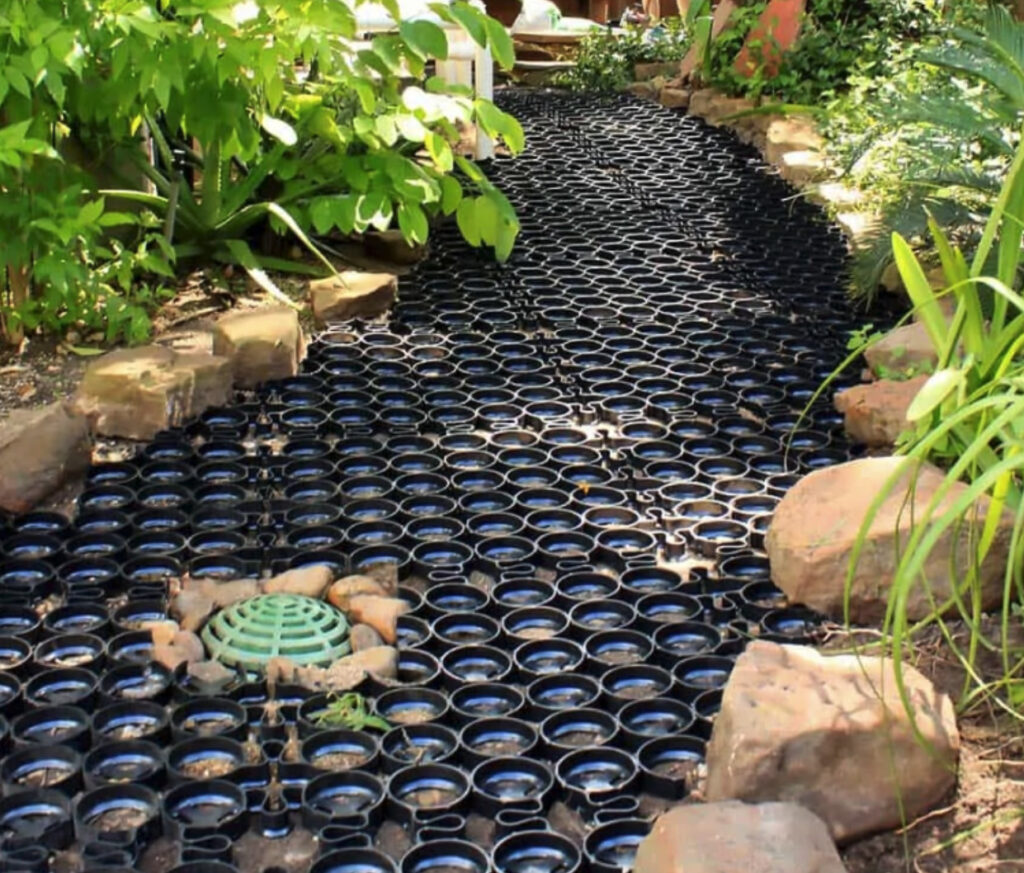
Start by sketching your walkway’s path, considering the width you’d like and any curves or turns. Mark your design on the ground with stakes and string, ensuring it aligns with your design. During the planning phase, you should also figure out the depth of your base layer.
2. Prepare the Site
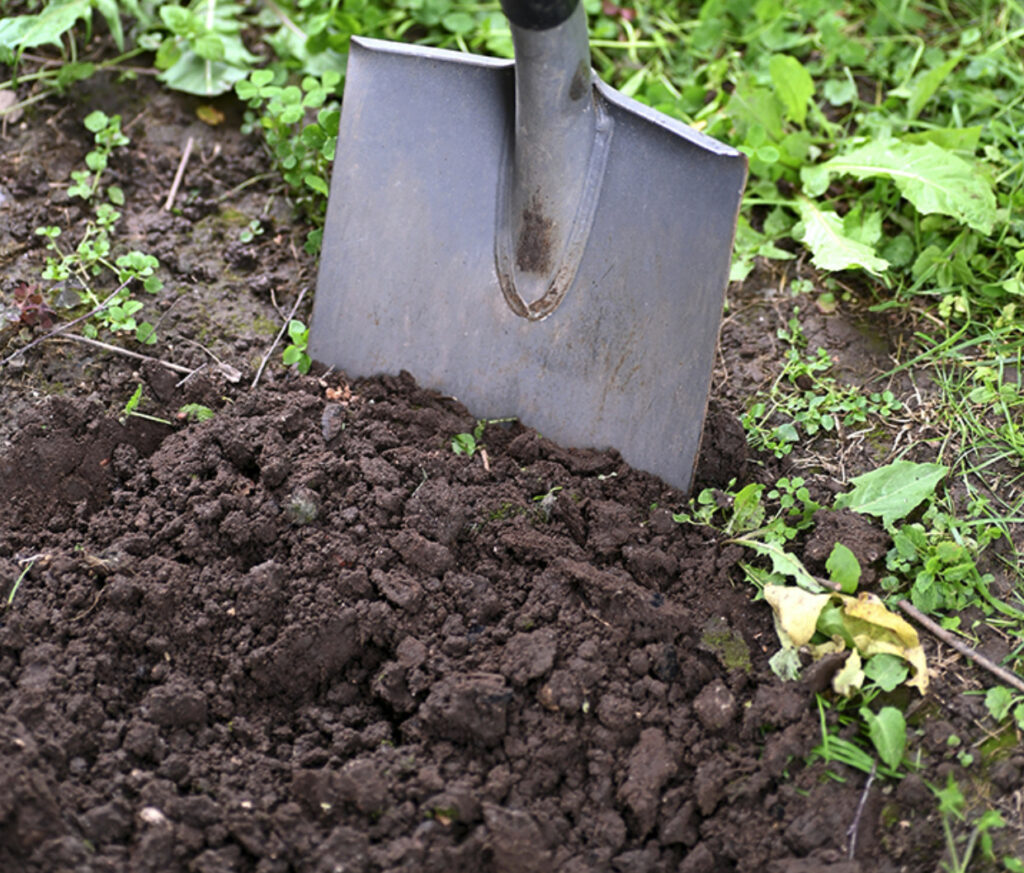
Remove any grass, rocks, or debris from your marked pathway. Dig down to a depth of around 3 to 10 inches to create room for your gravel base, and allow enough depth for proper drainage and paver installation. Level the soil as much as possible, and make sure the surface slopes slightly to direct water away from your home. The excavated area should be slightly larger than the planned walkway surface. Compact the soil with a hand tamper plate compactor.
3. Install the Geotextile Fabric
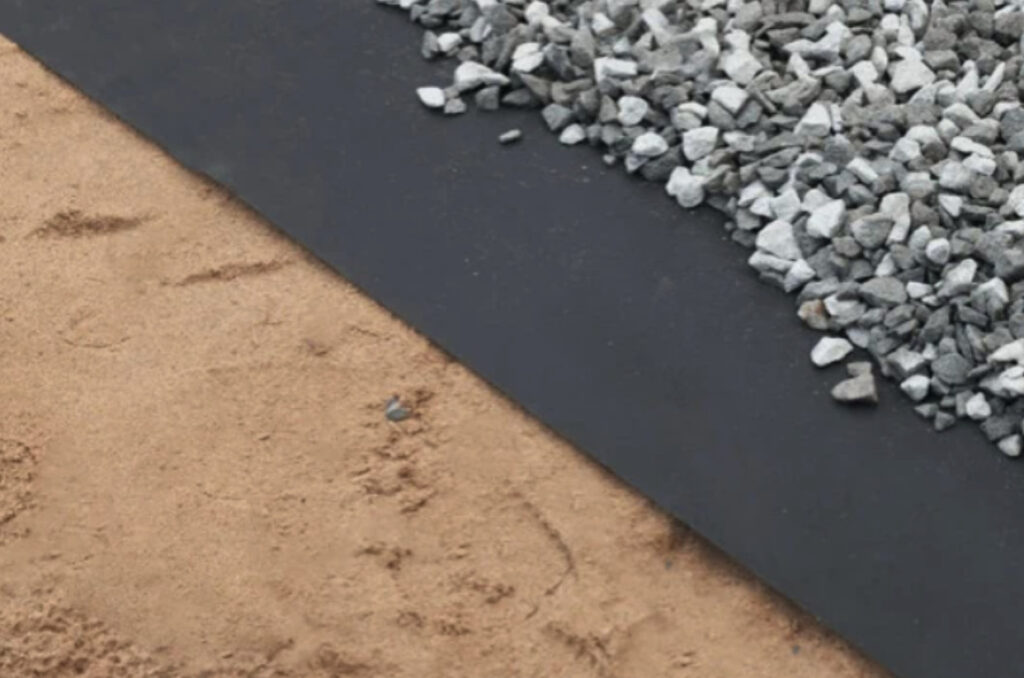
Lay the permeable geotextile fabric (landscape fabric) across the entire pathway area and cut it to size. This layer prevents the gravel from sinking into the soil below, and will enhance the stability of your pavers and improve drainage. You may want to pin the overlaps and other areas of the fabric with sod staples or nails with washers.
4. Lay and Compact the Base Layers

Pour a layer of coarse gravel over the geotextile fabric and use a compactor to press down the gravel firmly, to create a solid, level base. Repeat this process with progressively smaller and smaller gravel, ensuring each layer is compacted thoroughly before moving on to the next.
5. Lay the Pavers
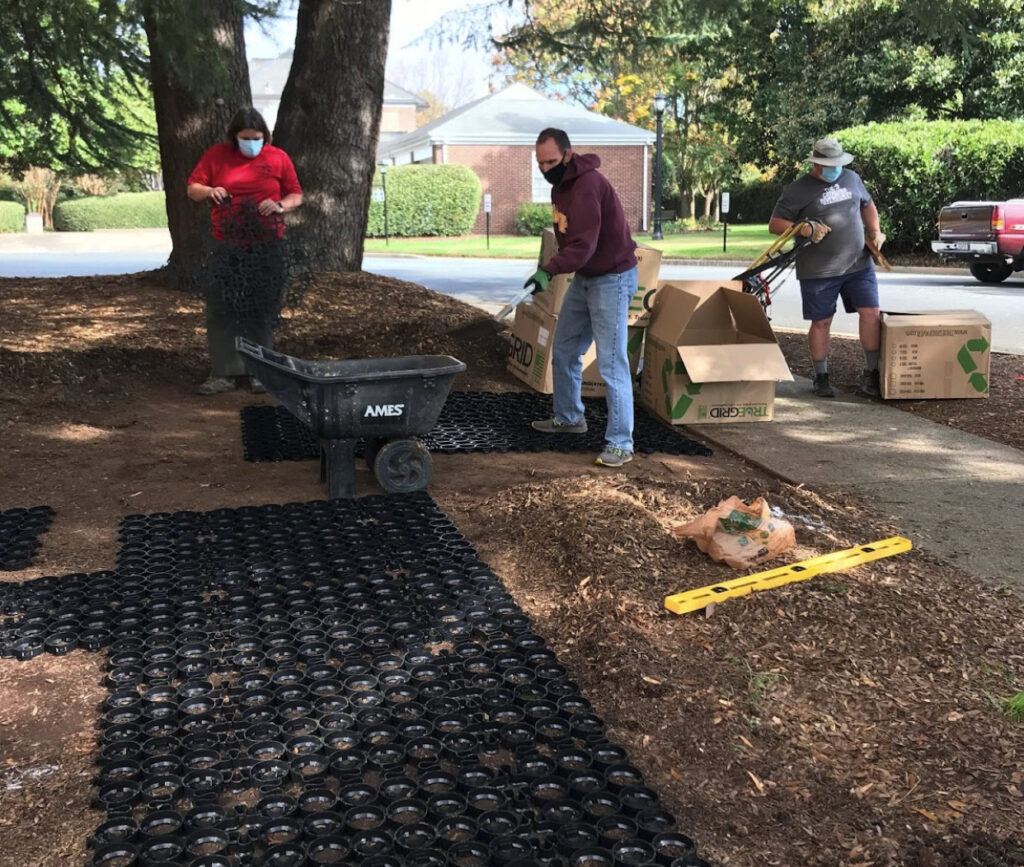
Place your permeable pavers directly on top of the compacted base layer, and fit them snugly together. Connect pavers when possible. Cut the pavers to fit the area or when curves are needed.
6. Fill the Pavers

Fill the spaces within and between the pavers with angular stones or gravel of your color choice. Keep infill level to the top of the pavers – do not overfill. Your DIY pathway is complete!
How to Solve Common Challenges in a DIY Walkway Installation
Even with careful planning, challenges can arise during your DIY walkway installation. Here are some common issues and how to solve them.
Uneven Surfaces Post-Installation
Make sure you keep everything super level and compacted during the sub-base installation. Consistently check for evenness as you lay each layer of gravel to prevent an unsteady walkway. If you end up with uneven surfaces, you may need to redo some layers or add more to the topmost layers.
Water Pooling
Although TRUEGRID is permeable, extremely heavy rains may be too much for the area to handle. You can help this by grading the path slightly away from your home, and consult a professional if you’re unsure about your DIY drainage design.
Weed Growth Through Pavers
Using a high-quality geotextile fabric and quality open-graded stone for the base can minimize weeds. If worse comes to worse, regular maintenance will keep your walkway looking pristine.
Prevent Clogging
Keep debris, leaves, and other sediment from building up on your path. Plus, using a geotextile fabric between the aggregate base and soil will prevent sediment from seeping through.
For more helpful information, check out our previous article on How to Keep Gravel in Place on Driveways and Walkways.
Simplify Your DIY Walkway Installation with TRUEGRID®
Are you ready to create your very own DIY walkway with permeable pavers? With TRUEGRID® pavers, it’s easier than ever to build your own walkway. Our paver system’s user-friendly design, combined with the right preparation, will ensure that your pathway looks great and lasts for years. Contact us today to learn more!
While you’re here, are you thinking about installing permeable pavers in your driveway?
Check out our comprehensive guide on planning and budgeting for a DIY driveway.

Have you ever thought about how much time you spend shoveling snow or how much money goes into snow removal services every winter? Heated parking lots are rising in popularity as a modern solution to snow and ice build-up because they offer a maintenance-free surface that stays clear no matter how much snow falls.
Are they worth the investment, and are there better alternatives? In this article, we’ll dive into the world of heated parking lots and give you everything you need to know to decide whether they’re the right choice for you. Let’s get started!
What is a Heated Parking Lot?
A heated parking lot is designed to melt snow and ice automatically, to keep surfaces clear without the hassle of manual snow removal. These systems work by installing a heating mechanism underneath the pavement, which warms the surface just enough to prevent snow from accumulating. Here’s a quick look at the common heating options for parking lots:
Electric Heating Cables
Cables are installed beneath the surface and use electricity to generate heat that radiates upward in order to melt snow and ice.
Hydronic Systems
Similar to electric heating cables, hydronic systems use pipes that are installed beneath the driveway’s surface. Heated water is then pushed through the pipes, to heat the surface and melt the snow and ice.
What Places Can Benefit from Heated Parking Lots?
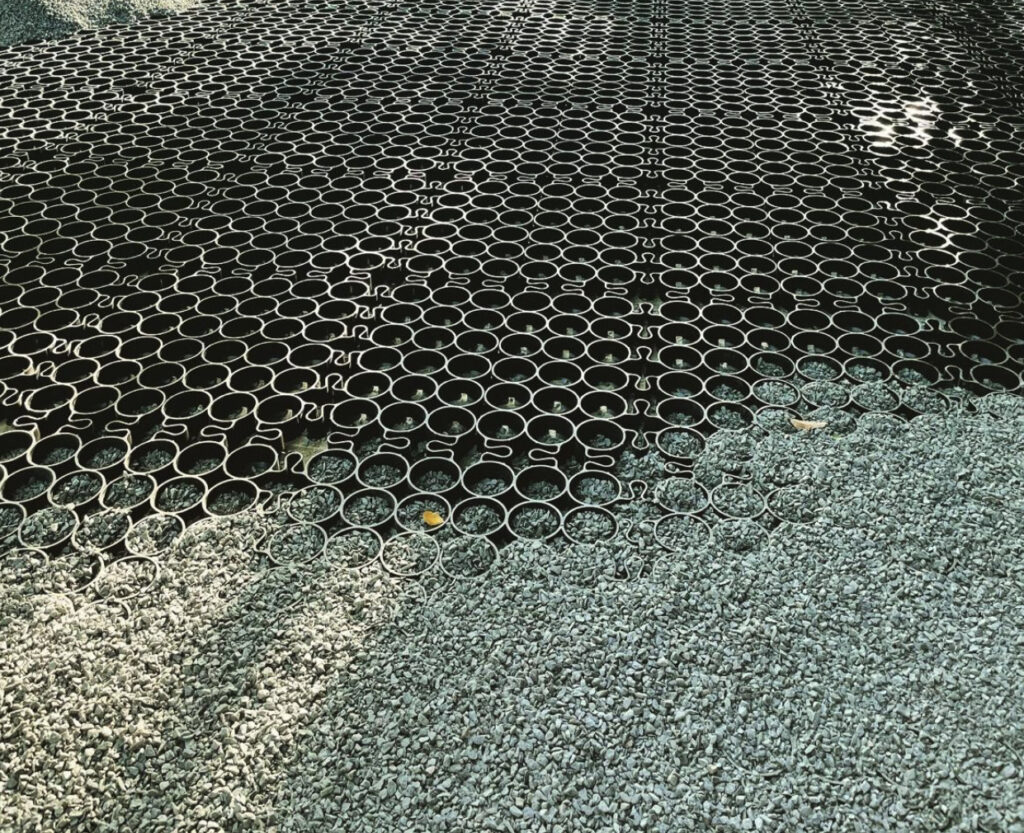
Heated parking lots can be especially beneficial in areas with heavy snowfall or frequent icy conditions. Commercial properties like shopping centers, hospitals, and office buildings would benefit greatly from them, because these locations prioritize safety and accessibility for their customers and employees.
Residential properties with sloped driveways or large parking areas would also benefit from heated driveway systems because they essentially eliminate the need for constant maintenance. Essentially, any multi-resident home or place of business that suffers from extremely cold weather could benefit from a heated parking lot.
Heated Parking Lot Costs
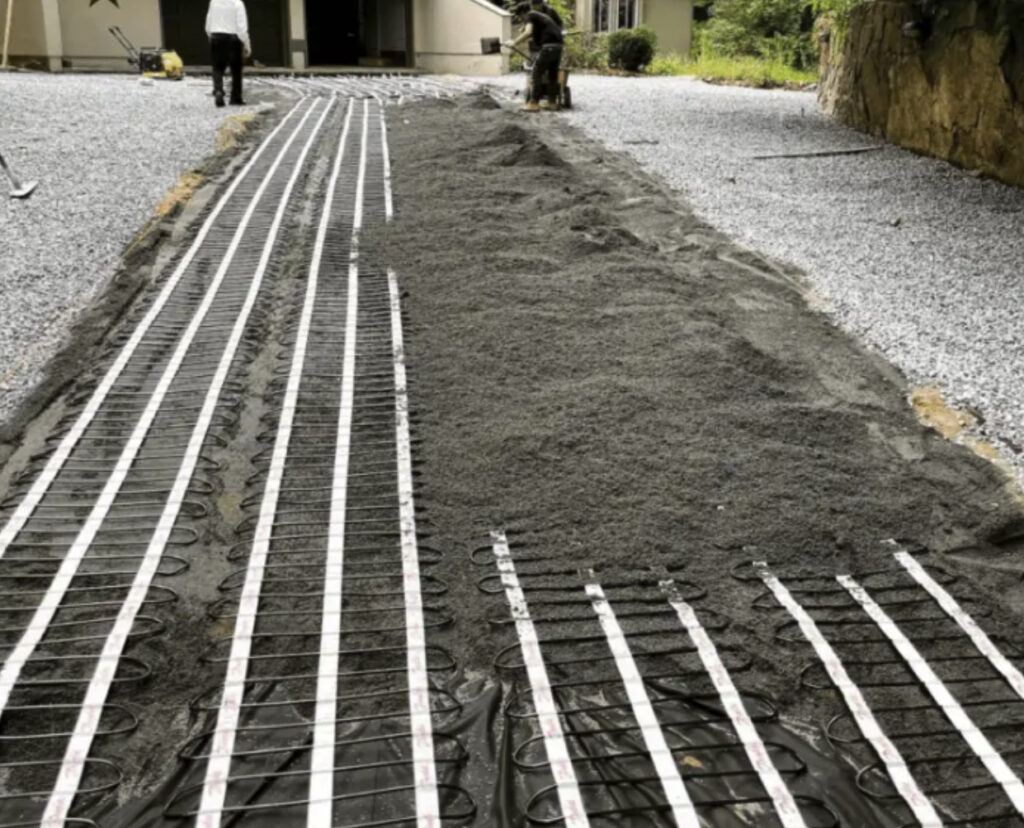
Investing in a heated parking lot can be appealing, but it’s important to consider the costs. The price can vary significantly depending on the heating system and the size of the area you’re trying to heat. Here’s a look at the costs of heated parking lots:
- Electric Heating Cables: Typically cost between $5 to $9 per square foot, not including the added cost of labor.
- Hydronic Systems: Cost between $15-$30 per square foot, not including the added labor costs.
- Parking Lot Surface Materials: Since heated parking lots will essentially require a brand-new parking lot surface, you’ll need to consider the cost of installing a new driveway on top of the heating elements. This cost can vary depending on the surface area, the contractor, and the materials you choose.
- Labor Costs: These costs vary depending on your contractor.
- Control Panels: In order to operate a heated parking lot, you’ll need a control system, which ranges from $600 to $3,800.
The Pros and Cons of Heated Parking Lots
Installing a heated parking lot comes with significant advantages, but it’s not without its disadvantages. Here’s a closer look at the pros and cons of heated parking lots:
Pro: No More Shoveling
Imagine never having to pick up a snow shovel again. Heated parking lots make snow shovels and blowers a thing of the past because they melt it before it can build up and become a problem.
Pro: No Snow Removal Services
Heated parking lot systems eliminate the need for snow plow services, which can save substantial money over time, particularly for large commercial parking spaces.
Pro: Safety
Snow and ice create dangerous conditions for residents and customers, and a heated lot drastically reduces the risk of slips, falls, and accidents.
Pro: Protects Driveway Surface
By avoiding the freeze-thaw cycle, heated lots protect your pavement from cracking and damage, which extends the life of your parking lot surface.
Pro: Better Traction
Clear, dry surfaces mean better grip for cars and people, which makes your lot safer for everyone to walk or drive on.
Con: Limited Area of Effect
Even the best systems struggle in extreme conditions, leaving some areas less effective than others, particularly near curbs and edges. Also, if you don’t install radiant heating systems in your walkways and sidewalks, people are still in danger of falling when using your parking lot.
Con: Initial Costs
The cost of installing a radiant heating system is high, especially for large parking lots. This upfront expense can be a barrier for many property owners.
Con: Difficult Installation
Installing a heated parking lot involves significant excavation and disruption, which can be time-consuming and impractical for properties that rely on their parking lots.
Con: Energy Costs
Heating a large surface requires considerable energy, which leads to high operational costs, especially in areas with harsh winters.
Con: Difficult to Repair
If something goes wrong beneath the surface, repairs can be complicated and expensive, often requiring complete replacement of the affected area.
Try Permeable Pavers With or Without a Snow-Melt System
While heated parking lots offer some advantages, permeable pavers are a super strong alternative, particularly in snowy regions. These innovative pavers allow water to drain through, to reduce ice formation and improve traction, naturally. Unlike heated parking lots, which require constant energy and upkeep, permeable pavers work passively to keep your surface safe and dry.
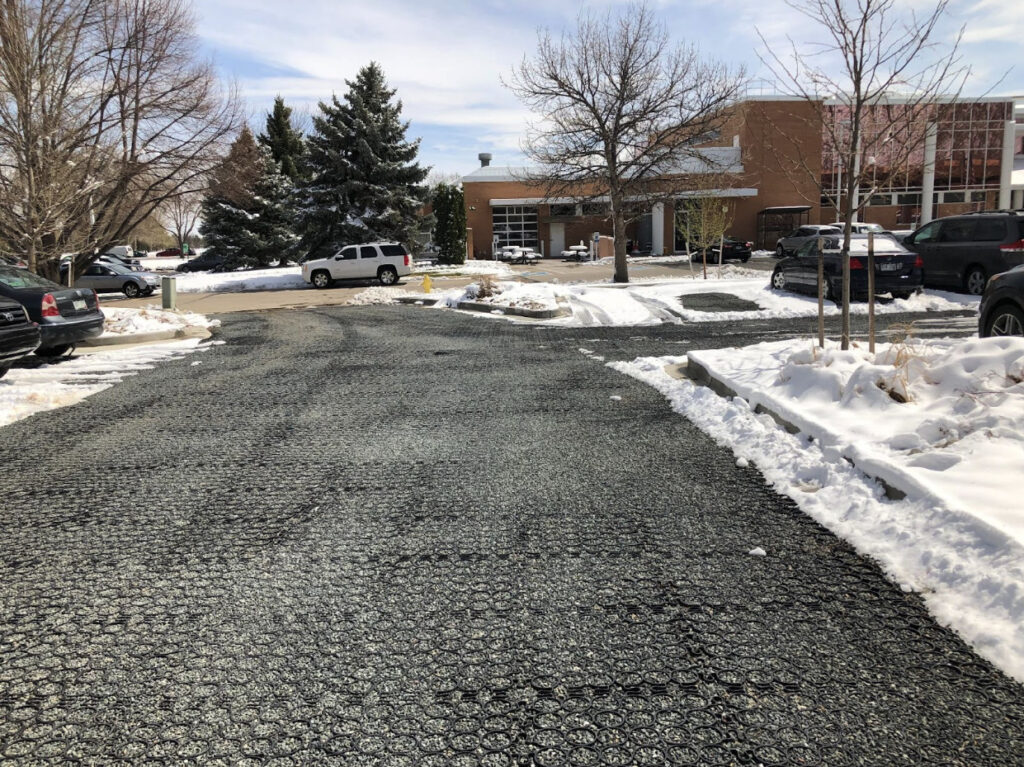
Stabilize Your Parking Lot with Permeable Pavers from TRUEGRID®
If you’re considering a more sustainable, cost-effective approach to snow management, permeable pavers from TRUEGRID® are the solution for you. The innovative design of our permeable paver system improves traction, minimizes ice build-up, and protects your parking lot from the elements – all without the high costs of radiant heating systems.
Ready to upgrade your parking lot?
Contact us today to learn more about how our permeable pavers can transform your parking lot!

As urban areas continue to expand and evolve, city planners and developers face increasing pressure to find sustainable, efficient ways to manage land use. Brownfield and grayfield renovations offer a promising solution, allowing cities to transform neglected spaces into valuable assets.
At TrueGrid, we’re proud to support these redevelopment projects with our innovative permeable paving solutions, which enhance environmental resilience, promote green infrastructure, and create functional, visually appealing urban areas.
Keep reading to learn more about what defines brownfields and grayfields, explore their unique challenges, and discover how urban areas are tapping into these spaces to create economic, social, and environmental benefits with sustainable products like ours.
What are Brownfields?
Brownfields are properties previously used for industrial or commercial purposes and are often characterized by environmental contamination. These sites may contain pollutants or hazardous substances left behind from prior activities, making redevelopment a costly and complex process. Examples include former factories, abandoned gas stations, or defunct rail yards.
While brownfields are often located in densely populated urban or suburban areas, they’re typically avoided by developers due to the associated cleanup costs and legal liabilities.
However, brownfields also hold potential due to their prime locations. As cities seek to revitalize neglected areas, brownfield redevelopment has become a way to balance environmental responsibility with economic gain.
With TrueGrid products, developers can support environmental health, reduce runoff, and help prevent flooding while working toward sustainable urban transformation. Our permeable pavers provide a sustainable solution for managing stormwater, helping to filter residual pollutants, and minimizing the need for traditional concrete.
What are Grayfields?
Grayfields differ from brownfields in that they lack contamination. Instead, grayfields are often underused or obsolete commercial properties, such as empty malls, outdated office buildings, or old parking lots. While they don’t pose the environmental hazards of brownfields, grayfields often suffer from neglect, contributing to urban decay. These areas usually require more structural overhauls and modernization rather than environmental remediation.
Grayfield redevelopment can be seen as a strategic response to shifting urban needs. As the commercial landscape changes, with e-commerce reducing the demand for traditional retail spaces, cities face an increasing number of grayfield properties. Installing TrueGrid Pavers as part of green infrastructure on grayfield sites can improve aesthetics while supporting eco-friendly urban drainage solutions.
Our pavers offer a “blank slate” for urban planners and can easily be customized for various green and community-oriented designs, minimizing the heat island effect often found in highly concrete-dense areas.
Challenges and Incentives for Redevelopment
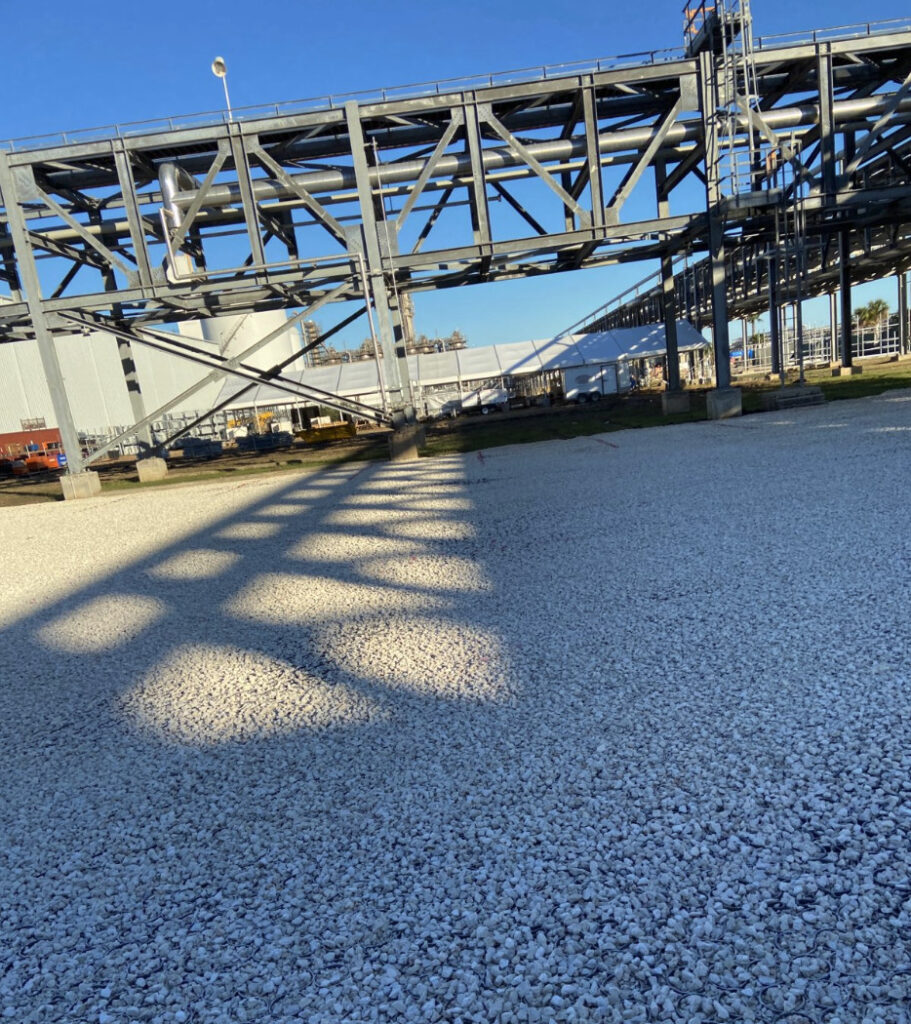
Brownfield and grayfield renovations come with distinct challenges, such as the need for environmental cleanup in brownfields and the structural modifications often required for grayfields. Both types of redevelopment can be costly, and the timeline for construction or adaptation may be extended due to regulatory or logistical hurdles.
To address these challenges, Environmental Protection Agencies and urban development programs in countries like the U.S. and Canada, for example, provide funding to support brownfield cleanups and redevelopment, while some cities offer incentives for converting grayfields into mixed-use or residential spaces.
Grants, tax breaks, and regulatory support can help offset costs, making these projects more viable for developers. By using TrueGrid Pavers, we’re able to ease development hurdles by reducing traditional paving costs and supporting sustainable land management practices, all at a lower installed and operational cost.
The Future of Brownfield and Grayfield Renovation
As urban populations grow and land becomes increasingly scarce, brownfield and grayfield renovations will play an essential role in sustainable urban development. The appeal of these projects lies in their ability to revitalize neglected areas, reduce sprawl, and provide new spaces without disturbing natural landscapes.
Looking forward, urban planners and developers are expected to approach brownfield and grayfield sites with more innovative designs, integrating green infrastructure, renewable energy, and smart city technologies. At TrueGrid, we’re excited to offer sustainable building materials that enhance land use, support natural water cycles, and reduce urban heat—crucial factors in climate-resilient, sustainable development.
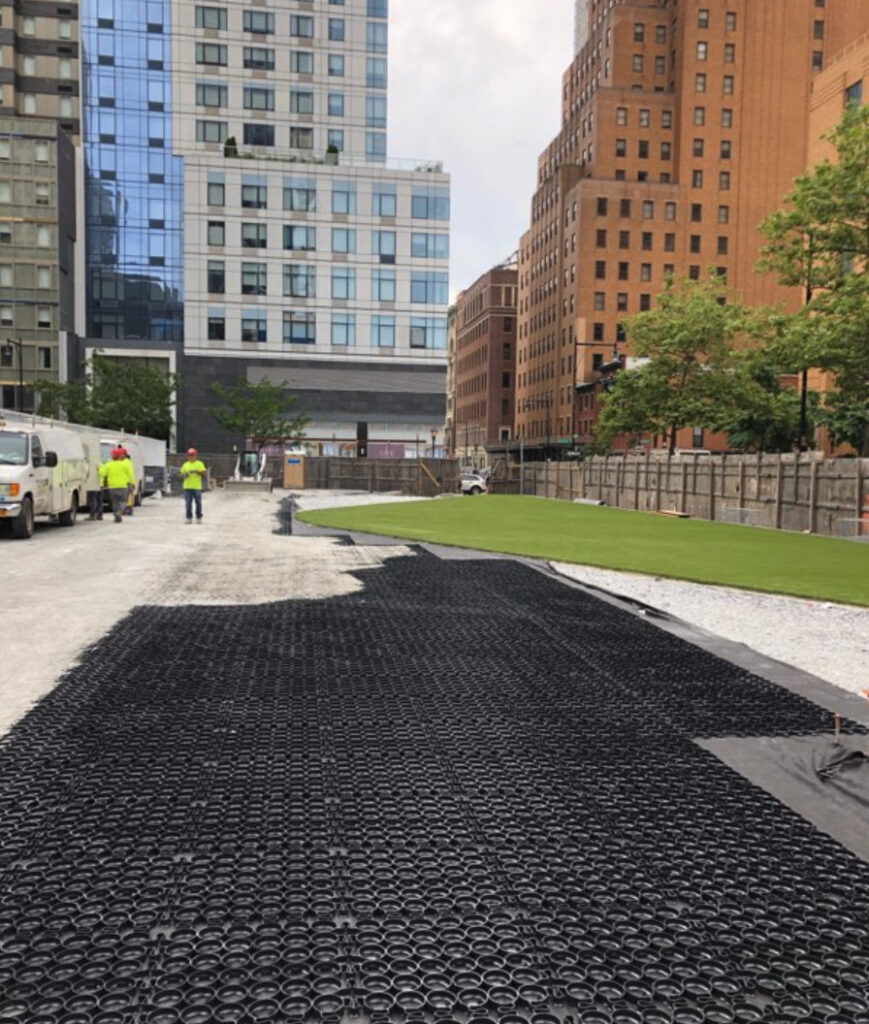
Breathing New Life into Forgotten Spaces
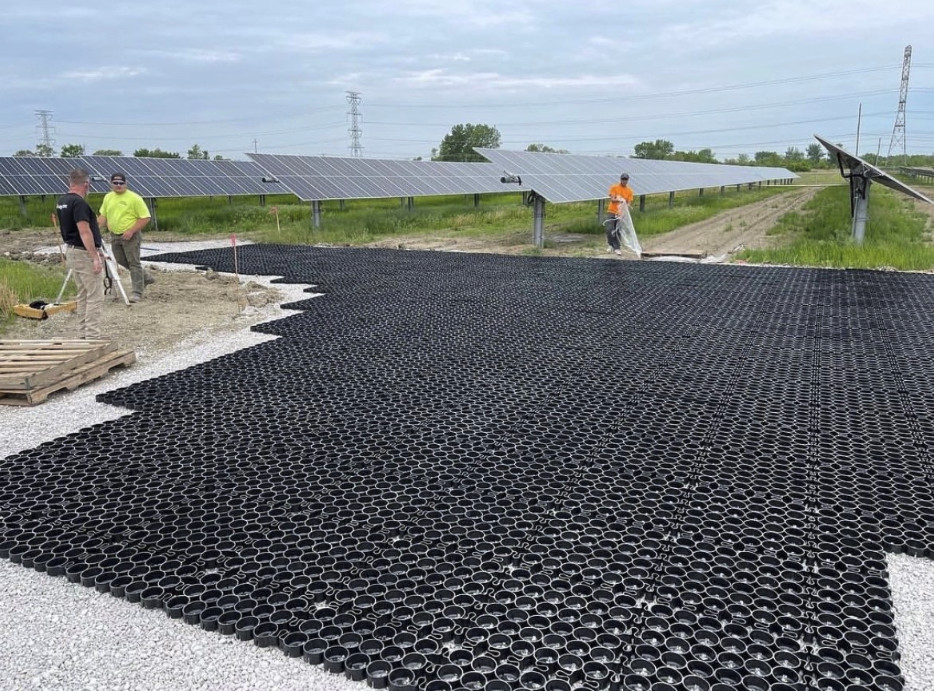
Brownfield and grayfield renovations provide a unique opportunity for cities to transform underutilized or neglected properties into valuable assets, enhancing the urban landscape while promoting sustainability. Through housing, green spaces, cultural centers, and innovation hubs, these sites can be repurposed to meet evolving community needs.
By embracing these redevelopment projects and incorporating sustainable solutions, cities can improve aesthetics, foster economic growth, promote environmental health, and enhance social vibrancy for all residents.
Transform your next urban project with TRUEGRID’s sustainable, permeable paving solutions. Contact us today to create eco-friendly, resilient spaces that work in harmony with the environment!

Are you considering a new driveway and wondering if a tar-and-chip driveway might be the perfect fit? With so many options available, it’s important to know what you’re getting into. That’s why we created this comprehensive guide, that covers everything you need to know about tar-and-chip driveways to help you make an informed decision.
Let’s jump right in!
What is a Tar-and-Chip Driveway?
A tar-and-chip driveway, also known as a chip-and-tar driveway, is a cost-effective driveway material that’s gaining popularity among homeowners. It’s made by spreading a layer of hot liquid asphalt over the driveway surface and then covering it with loose stones or gravel.
This process creates a textured surface that’s rustic, durable, and functional because it gives your driveway more traction.
Tar-and-Chip Driveway Pros and Cons
If you’re thinking about installing a tar-and-chip driveway in your home, it’s absolutely crucial that you understand the pros and cons. Here’s a comprehensive list of the benefits and disadvantages of tar-and-chip driveways:
The Pros
Let’s start by discussing the pros of tar-and-chip driveways.
Low Cost
One of the biggest draws is the lower cost compared to other paving options. The cost of tar-and-chip driveway is often less than asphalt or concrete because the materials are relatively inexpensive. However, it’s important to note that while the material costs are low, the cost can vary widely based on labor and the specifics of your project.
Low Maintenance
Tar-and-chip driveways are often promoted as low-maintenance solutions. The rough surface doesn’t need frequent sealing like asphalt, and minor cracks or imperfections are less noticeable. You’ll find that basic upkeep, like occasional sweeping and repairing potholes, is enough to maintain their appearance.
Great Traction
One major benefit is their excellent traction. The textured surface helps reduce skidding, which makes it a safer option during rain or snow. For those who live in regions with inclement weather, this can be a significant advantage.
Durability
How long does a tar-and-chip driveway last? Generally, these driveways are known for their decent lifespan, typically lasting around 10 to 15 years, depending on weather conditions and maintenance. While not as long-lasting as concrete or permeable pavers, they are pretty durable.
Environmental Impact
Tar-and-chip driveways use less petroleum in the installation process, making them more eco-friendly than a new asphalt driveway installation.
The Cons
Now, let’s take a moment to discuss the cons of tar-and-chip driveways.
Messiness
Despite the benefits, tar-and-chip driveways can be messy, especially in hot weather. The tar can soften under intense heat, and cause stones to loosen and stick to tires or shoes. This will diminish the aesthetic appeal and also cause you to track tar and gravel into your home or garage.
Difficult to Install
Installing a tar-and-chip driveway is not a DIY project—it requires specific machinery and skilled labor to get it right. As a result, finding a qualified contractor can be challenging, since not all paving companies offer this service.
Not a Lot of Contractors
As we mentioned above, a notable downside with tar-and chip driveways is the limited availability of contractors experienced in these types of driveway installations. The process requires special knowledge and equipment, which not every paving company possesses.
Easily Damaged
Tar-and-chip driveways are more susceptible to damage from heavy vehicles, sharp objects, and extreme weather conditions. Over time, the stones can loosen, and create patches that require frequent repairs. The surface can also develop ruts and grooves from repeated use, making it less visually appealing than other driveway materials.
Limited Lifespan
While tar-and-chip driveways are durable, they don’t last forever. The limited lifespan of these driveways means you’ll eventually need to invest in repairs or a complete replacement. Frequent weather changes and the natural settling of the driveway can cause it to degrade faster than expected, making it less cost-effective in the long run than some of the other options available.
A Better Alternative: TRUEGRID® Permeable Pavers
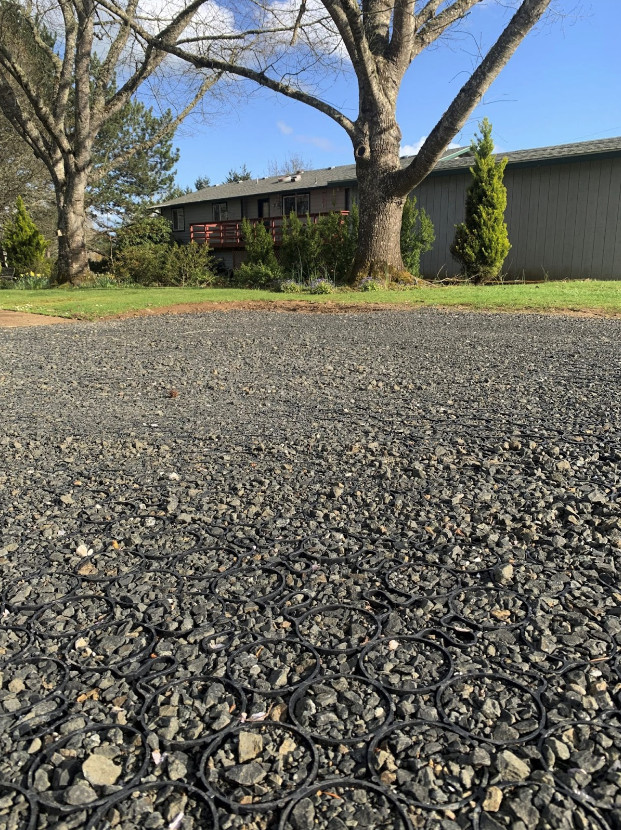
If the challenges of tar-and-chip driveways have you second-guessing whether they’re right for you, consider a better alternative – permeable pavers from TRUEGRID®. Our permeable pavers are a superior driveway solution that combines the rustic look of a tar-and-chip driveway with the added benefits of permeable pavers.
Our pavers are designed to allow water to pass through in order to reduce runoff and erosion, which is a major upgrade over traditional driveways that can’t handle heavy rain. Unlike tar-and-chip, permeable pavers are easy to install, durable, and virtually maintenance-free. They provide excellent traction and can support heavy loads without crumbling or losing stones.
Plus, TRUEGRID permeable pavers will last 3 to 4 times what a tar-and-chip driveway will. This means you’ll have a higher return on investment and be more satisfied with your installation.
Create Your Permeable Driveway with TRUEGRID®
Ready to move beyond the limitations of traditional driveways? At TRUEGRID®, we offer state-of-the-art permeable pavers, which boast the same benefits as tar-and-chip driveways, plus a few more!
Contact us today to learn more about how you can upgrade your driveway with our innovative permeable paver systems.

